Each layer is 307.2 m tall (1,024 blocks of 0.3 m). Gravity is about 16.5 m/s², a little under twice Earth's, so falls hurt. Layers 1 to 5 are described from the demo, which most players know well; layers 6 to 11 are from the developer's notes, the 1.0 database at wikily.gg and player reports, and are labelled as early info. Database
Layer overview
| # | Layer | Starts at | Air temp | Main threats |
|---|---|---|---|---|
| 1 | Gravel lands | 0 m | 13 to 19°C | Spike traps, Jump pads, Geysers |
| 2 | Deeper gravel lands | 307 m | 12 to 21°C | Bear traps, Barbed fences, Cave tick swarms |
| 3 | Dried desert | 614 m | 13 to 33°C | Turrets, Landmines, Coils |
| 4 | Wasteland | 922 m | -20 to 39°C | Sound cannons, Spent fuel, Toxirock |
| 5 | Overgrown depths | 1229 m | 18 to 31°C | Elder thornbacks, Thornbacks, Overgrown ticks |
| 6 | Frozen chasm | 1536 m | -33 to -24°C | Freezing cold, Snow striders, Gunmines |
| 7 | Fungal pools | 1843 m | 14 to 23°C | Constant rain, Sawblades, Grabber shrooms |
| 8 | Crystalline hollow | 2150 m | 17 to 21°C | Crystal hazards, Manifestations, Very large drops |
| 9 | Geothermal vents | 2458 m | 35 to 43°C | Extreme heat, Magma |
| 10 | WHERE WE MUST REACH | 2765 m | 15°C | Story layer |
| 11 | CRIMSON ASCENT | 3072 m | 16 to 23°C | Story layer |
Layer 1: Gravel lands
Every run starts here and it never comes back. Lit by holes in the background, short falls, wooden scaffolding. The safest layer: use the full timer to build bags, a canteen and a weapon.
Threats: Spike traps, Jump pads, Geysers, Shade crawlers.
Plants: Glowplant, Geotree, Mushplant, Leadbush, Stoneplant.
Layer 2: Deeper gravel lands
The darkest early layer. Carry light and raise gamma. Finish your preparation here: layers 3 and 4 have little water. Drill pods appear in layers 1 and 2.
Threats: Bear traps, Barbed fences, Cave tick swarms, Spike traps, Jump pads.
Plants: Glowplant, Geotree, Lumalgae, Mushplant.
Layer 3: Dried desert
Big caves and long drops. Oil is thick and easy to drown in with a broken leg. Rose lights and climbable sand vines spawn here. Water is scarce.
Threats: Turrets, Landmines, Coils, Stalactites, Tall drops, Wall biters, Oil pools.
Plants: Cactus, Brownshroom, Sand rose, Vine, Dried bush.
Layer 4: Wasteland
Radiation is always present: spent fuel and toxirock. No enemies unless the layer rolls Infested. Sound cannons only spawn here. Helluce for internal bleeding starts appearing from layer 4.
Threats: Sound cannons, Spent fuel, Toxirock, Landmines, Turrets, Coils, Stalactites.
Plants: Plantiation, Cactus, Stoneplant.
Layer 5: Overgrown depths
The jungle. Food and water are everywhere, but elder thornbacks hunt you. Ilmenite for titanium only spawns from layer 5. Last layer of the demo.
Threats: Elder thornbacks, Thornbacks, Overgrown ticks, Skullcrushers, Grabber plants, Wall biters.
Plants: Almost every plant, Banana-plant, Tree sap.
Layer 6: Frozen chasm
The cold kills faster than enemies. Move between ion space heaters, Xaloris plants and life pods, and stay dry. Players report very tall open drops: bring climbing rope.
Threats: Freezing cold, Snow striders, Gunmines, Ice stalagmites, Huge drops.
Plants: Xaloris, Frigiant.
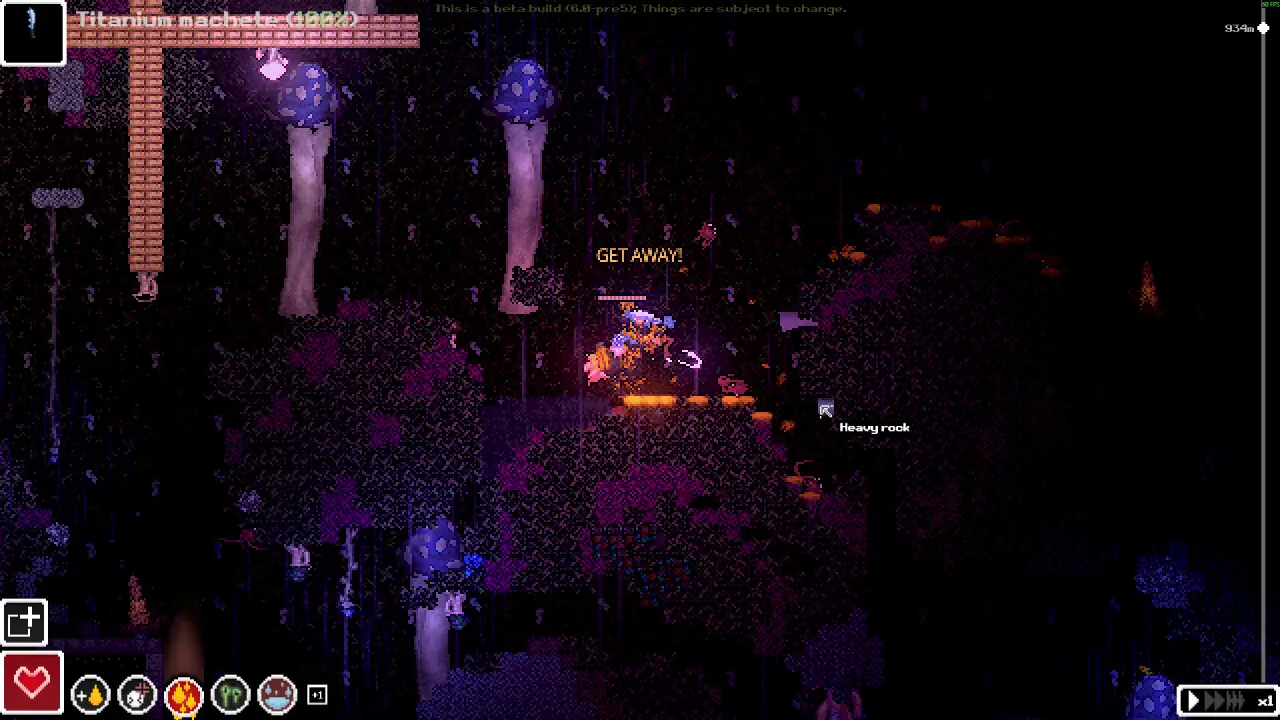
Layer 7: Fungal pools
Rain keeps you wet, and sleeping wet risks freezing. Sleep in a life pod or a sleeping bag. Fungali bungali drops bunchunk for procoagulant.
Threats: Constant rain, Sawblades, Grabber shrooms, Side stabbers, Overgrown ticks.
Plants: Fungali bungali, Glowshroom, Mushroom trees.
Layer 8: Crystalline hollow
Crystals with different effects: some heal, some burn, irradiate, explode or drain batteries. Learn the colours before you touch them.
Threats: Crystal hazards, Manifestations, Very large drops.
Plants: Crystals.
Layer 9: Geothermal vents
Heat is the main threat. Above 41.5°C body temperature you get heatstroke and lose brain health. Strip insulating gear, stay wet, carry water.
Threats: Extreme heat, Magma.
Layer 10: WHERE WE MUST REACH
Where the cargo goes. The endings start after this layer.
Threats: Story layer.
Layer 11: CRIMSON ASCENT
The shorter 11th layer. All three endings trigger from the top of it.
Threats: Story layer.
Time limit and the radiation line
On the default Tough preset each layer gives you 60 minutes. When time runs out, a radiation line appears at the top and moves down, reaching the bottom roughly 20 minutes later. It irradiates whatever it overtakes. It is a push to keep moving, not an instant death. Relaxed gives 120 minutes, Paradise 180, and Unchipped has no line at all since 1.0. While you are unconscious the line slows to 1% speed. Official
At the bottom of each layer you choose to continue or save and quit. Saving between layers is the normal way to stop a run: see saving.
Drill pods
Broken drill pods appear in the early layers. Repair one with a drill repair kit (1.0 simplified the recipe) and crouch inside to skip 2 layers down. The September update added more drill pods and made them easier to use, and 1.0 made them hurt your stats less. Using one unlocks Express Route. Skipping layers skips their loot, so it is a trade. Official
Layer modifiers
A layer can rarely roll a modifier. The Desolate preset forces one on every layer. Some cannot appear on layer 1 since demo 7.0.
| Modifier | Effect |
|---|---|
| Foggy | Fog and stronger bloom on lights |
| Hot / Scorching | Air temperature +4°C / +8°C |
| Cold / Freezing | Air temperature -4°C / -10°C |
| Flooded | Many more liquid pools |
| Dried | Few exposed pools |
| Rainy | Rain makes you wet |
| Infested | More enemies |
| Ionized | Waste barrels everywhere, plus some anti-rad |
| Solar-struck | Your chip is disabled: Unchipped for the whole layer |
Descent tips
- Explore side to side in an S pattern before going down.
- Throw a glowplant fruit into dark drops before jumping: it lights the floor and triggers traps.
- Carry a full scrap metal for placing tiles to climb, and climbing rope for tall drops. Players report very tall open drops from layer 6.
- Break geysers near your path and avoid flowing water.
- Treat everything as possibly hiding a landmine on layers 3 and 4.
Questions
How many layers are in Casualties: Unknown?
Eleven: ten main layers and a shorter 11th layer, per the developer's September update. The demo has the first 5. Endless mode keeps generating layers after that.
Are the layers procedurally generated?
Yes. Each layer is generated fresh every run from its biome rules, so there is no fixed map. Rare layer modifiers can also change a layer.
What happens when the layer timer runs out?
Nothing instant. A radiation line (the Punishment Protocol) appears at the top of the layer after the time limit and creeps down, reaching the bottom about 20 minutes later on the default setting. Being overtaken irradiates you. Unchipped runs have no radiation line since 1.0.
How long should a layer take?
Players report 30 minutes for a fast descent and 60 to 80 minutes when looting, crafting and trading. Most recommend using the full time on layers 1 and 2 to prepare and moving faster from layer 3.
Sources
- Database Layers wikily.gg, checked 2026-11-11
- Community wiki Layers Scav Prototype / C:U wiki, checked 2026-09-21
- Community wiki Layer modifiers Scav Prototype / C:U wiki, checked 2026-06-24
- Community wiki Drill pod Scav Prototype / C:U wiki, checked 2026-09-21
- Official September progress update Steam news, checked 2026-09-15
- Official Casualties: Unknown launches November 9th Steam news, checked 2026-10-15
- Official Release 1.0 patch notes Steam news, checked 2026-11-09
- Players How long do you take for one layer? Steam forum, checked 2026-11-11
- Players Layer 6 is absolutely insane Steam forum, checked 2026-11-11
- Players Are the levels procedurally generated? Steam forum, checked 2026-11-11